 By now, we've all heard the joke: “How many (fill in with your favorite demographic group) does it take to change a light bulb?”
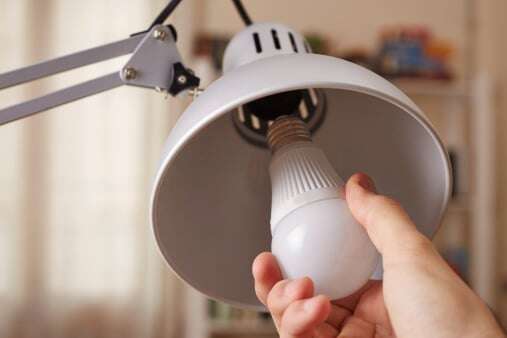
As you know, the answer is invariably “one,” but as you also may know, there's sometimes more to safely changing a light bulb than meets the eye. And it's no laughing matter when you receive an electrical shock or the bulb has become broken in the base and you have to remove it before changing it.
Basic Electrical Repair Tips for Changing a Light Bulb
So, all jokes aside, begin the process of changing a bulb by checking the fixture for the correct wattage of the bulb. Most fixtures are stamped with an instructional label, such as “Caution: To reduce the risk of fire, use a 60-watt type A or smaller lamp.”
Do not skip this vital step; according to the U.S. Fire Administration, there are nearly 29,000 electrical fires per year in the United States, and a great majority are caused by light bulbs that are too “hot” for the fixtures in which they were placed.
Once you have the replacement bulb in hand, proceed with this electrical repair and:
- Get a ladder or step ladder to reduce the risk of a fall if you're changing an out-of-reach bulb.
- Turn off the fixture and light switch. Admittedly, it can be difficult to tell if a fixture is truly “off” if the only bulb it requires to function has burned out. In this case, turn off the power at the fuse box. Similarly, if you can't tell whether a lamp is “on” or “off,” unplug it first.
- Let the light bulb within the base cool down before touching it.
- Twist the light bulb in a counter-clockwise direction until it becomes released from the socket. Set it aside.
- Align the replacement bulb in the socket and turn it clockwise until you cannot turn it anymore. As an extra precaution, keep your fingers out of the socket. And do not try to over-tighten the bulb; it can easily shatter in your hands.
- Safely dispose of the old bulb, perhaps by wrapping it in the package from the new bulb.
Removing a broken bulb from a socket is a bit trickier, but you can do it. First, make certain that the power to the fixture is turned off at the fuse box. Then:
- Place an old blanket or towel on the floor to catch any shards of broken glass.
- Put on a pair of leather gloves to protect your hands, and wear a pair of eye goggles if you're doing this electrical repair on an overhead fixture.
- Insert a pair of needle-nose pliers as far into the base of the broken light bulb as you are able.
- Rotate the pliers counter-clockwise. If you lose your grip, simply start again and continue turning until the base is released.
It's easy to under-estimate the difficulty of any job until you start it. So remember that a local Chico electrician at Experts In Your Home is just one phone call away if you encounter difficulties with this home electrical repair.
Learn which electrical repairs NOT to do yourself with this FREE guide:
.jpg)
.jpg)