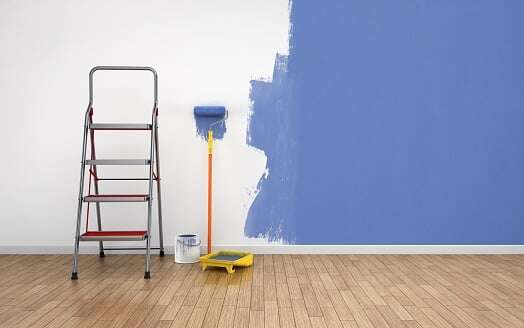
So, you’re about to paint one or more rooms inside your home? Great! Home painting can be an ideal way to modernize, add charm and character, brighten or darken, and freshen up a room with relatively little cost. Before you get the brush out and start painting, you may want to stop and read some advice we’ve compiled here at Experts In Your Home. While we provide home painting services, we also cheer on and help inform DIY home projects that you decide to tackle yourself.
To Start, here are some tips we always give regarding painting…then we’ll talk about prep work, primers, choosing colors, and give some very helpful application tips.
10 Home Painting Tips from Experts In Your Home:
- Consider color. Lighter colors can make a room look larger, and bolder colors can energize a lackluster room that needs a boost. If you're nervous about making too big of a change at once, consider confining a bold color to one wall and choosing a lighter, complementary color for the others. The sheer number of color choices can be dizzying, but Experts In Your Home can help you steady the color wheel.
- Sample and assess first, paint later. Color can look different in the presence of sunlight and shadows, which is why it's smart to buy a small bottle (or bottles) of paint before you buy what you need for your home painting project. Spread it on the wall or a white poster board and take a few days to observe it under changing light conditions.
- Review various paint finishes. Match the finish to the room you're painting and its function, not just how the sheen looks. Satin and gloss finishes hold up well in high-traffic areas and on trim. These finishes clean up easily, too. Flat finishes can reconcile shiny finishes in other parts of a room, but they can get dirty easily and do not clean up as well.
- Prep work is vital. We may say this a few times. Prepping is time-consuming – more so than painting – but cutting corners on washing walls, removing switch plates, patching, sanding and taping always shows up in serious imperfections in the end.
- Don't skip primer. Think of primer as peanut butter between two slices of bread; it covers any imperfections underneath and ensures that the top coat of paint “sticks.”
- Invest in quality tools. You'll need plenty: nylon bristle brushes for water-based paint, natural-bristled brushes for oil-based paint and foam brushes for intricate work. Rollers save time while an extension pole might save your back.
- Combine paint gallons for uniformity. Pouring all your paint into one large, sealable bucket isn't just a convenience measure; it allows you to stir the entire batch together to ensure uniformity of color – just in case a disparity occurred while the individual gallons of paint were being mixed at the store.
- Ignore the clock. Don't think of yourself as slow (especially with prep work); think of yourself as careful. You'll be happier with the finished product in the end. Don't bring furniture and other items back into a freshly painted room for at least 24 hours, and give your walls between two weeks and 30 days to fully cure. Avoid touching or washing the walls in the meantime.
- Store excess paint. Don't dispose of it. You'll probably need it for touch-ups at some point. For added ease, store some leftover paint in a small jar that you can easily tote around and label it accordingly.
- Remember that paint can be changed – and rather inexpensively. Even if you rushed the “sample and assess” stage, a “do over” will take less time. Sometimes it pays to take a step back, especially if you think the color you chose is too overpowering on all four walls.
Don’t Skip the Prep!
 Set aside plenty of time to prep a wall for paint – and then double that estimate for good measure. Perhaps more than any other household project, home painting prep can take time to finesse and get right. Rest assured that the time you invest will pay off later when you:
- Remove obstructions such as curtain rods, door hinges, fixtures, outlet covers, switch plates and other hardware.
- Survey the wall up-close – not from a distance – for dirt, stains and scuffs. Left untreated, even faint stains can bleed through paint. A damp cloth should remove many stains; use a mixture of mild dish soap and water and a soft sponge to remove others.
- Use a putty knife to gently remove loose or flaking paint from the wall. Sand the area with fine-grit sandpaper until it is smooth to the touch.
- Sand gloss from the wall – in the form of paint or faux effects – with fine-grit sandpaper.
- Fill cracks, holes and splinters with spackling compound. Press the compound into gaps with a putty knife, smooth it until it is flush with the surface and allow it to dry before sanding it smooth.
- Vacuum the wall from top to bottom with a soft brush attachment. Then wipe the wall with a tack cloth to remove any remaining traces of dust.
- Wash the wall with a mixture of mild dish soap and water or mild detergent. Wipe it dry with a tack cloth and then allow the wall to dry completely.
- Apply painter's tape so that you can apply paint unencumbered. Affix it around doors, windows, cabinets, trim and other architectural details. Once in place, take the extra step of securing the tape with your fingers or a spoon so that paint doesn't seep underneath.
- Create a “clear zone” so that you can move around freely, and spread drop cloths.
A Brief Word about Primer…
Our home painting experts are sticklers for quality, which is why they use primer. They know that primer can enhance paint's ability to provide a durable top coat while often reducing the number of coats that are necessary to achieve full coverage and a smooth finish.
At the same time, they are well aware that many people do not believe that priming is necessary, especially if a painted surface is in good shape, with no stains or chips, and they are not trying to cover an oil-based paint with latex. The choice is yours, of course, but always apply primer to:
- Untreated or raw wood
- New drywall
- Walls that are about to undergo a drastic change in color (especially from dark to light but also from light to dark)
Be sure to use a stain-blocking primer in high-humidity and high-moisture rooms, such as the kitchen, bathrooms and laundry room to reduce the chance of the paint flaking, peeling, bubbling or blistering.
You also might wish to try “self-priming paint,” which combines primer and paint in one can. Just remember that this is one of those times that you will get what you pay for, so choose a premium brand for the best result.
How to Choose Colors for Home Painting:
 1) Take Time to Assess Your Color Choice:
Realize from the start that the Experts will provide you with painted poster board samples before we apply paint to your wall. This will give you the chance to prop the poster board against the wall and assess how the color strikes you at different times of the day as natural light conditions change. We mention this pointer first to ease the fears of customers who are so nervous about picking the wrong paint color that they cannot focus on picking the right color. Take a day to assess your color choice. Take a week to assess your color choice. Then ask us to alter the color slightly or alter it radically. We encourage our customers to take all the time they need because we know that choosing paint colors is a process that deserves time and reflection.
2) Decide Personality and Mood:
Decide on the room's personality. Yes, we're Californians, but we believe that color establishes a mood. (How could it not?) So we think it's important to use personality and mood as a backdrop. Do you want a color to calm and soothe you (often appropriate for a bedroom) or engage and energize you (often appropriate for a home office)?
3) Look for Inspiration:
If you can't isolate a color you love – and love in your home – then look for inspiration. Some ideas are probably right in front of you while others may require some searching. Consider:
- The color of your upholstery, rugs or throw pillows
- The dominant color in a favored print or work of art
- The trim on a piece of furniture you'd like to highlight (since choosing a complementary paint color will make that furniture “pop”)
- Magazines, catalogs or Pinterest (a treasure trove of ideas, as long as you have the time to browse)
4) The Color Wheel:
Be prepared to “play” with a color wheel. We'll put one in your hands so you can see, right before your very eyes, how every color has a complementary “cousin.” Spending time with a color wheel can help you choose a color palette for your home painting project. Also known as a color scheme, it can guide many of your purchases, and not just for paint, but also for accessories and window treatments.
5) Dial Back Strong Colors:
Learn to “dial back” a strong color like the pros. Many of our customers initially say they are eager to infuse their homes with color, but lose their confidence mid-way through the selection process. They fear that even warm, inviting colors like pumpkin-coral or meadow green will overpower a wall and fall back on a “safe choice” in the off-white/beige/deep ivory family. This is fine – unless it leaves you yearning for the warmer color you sought in the first place. In this case, try confining a splash of color to one wall – the dominant wall – or choosing a lighter shade (or two) of the same color.
Paint Application Tips:
 Finally, it’s time to apply your paint! Here are a few tips for paint application:
1) Never Skip Home Painting Prep Work
Begin by prepping your wall as previously discussed in this article. While the wall dries, double-check that you have enough paint to cover the wall with two coats to ensure even coverage.
One gallon usually covers about 400 square feet. For a room, calculate square feet by multiplying the length times the width. Do the same for the ceiling, if you're painting that, too. And don't forget the trim: multiply the length, in feet, by .5 for the width.
If you're using more than one gallon of paint, mix the gallons together in a 5-gallon bucket and stir them together to ensure color uniformity.
2) Cut In First
- Pour some paint in a small container; it will easier to handle as you move up and down a ladder .
- Use a 2- to 3-inch trim brush to "cut in," which means to apply a strip of paint along the perimeter, where the wall and ceiling meet.
- Cut in one small section at a time. Alternate using the brush to cut in and the roller to paint the ceiling to prevent creating a harsh line. (A partner comes in handy here; one person can handle the brush while the other works the roller.)
3) Tackle the Ceiling
- Dip a roller into the paint and remove excess on the edge of the paint tray or roller grid.
- Start at a corner, near the “cut-in line” you just created.
- Paint across the width of the ceiling – not the length – to avoid neck and back strain.
4) Move to the “Main Event”
- Wait for the ceiling to dry before using a trim brush to cut in along the “crease” line between the wall and ceiling. (If you don't have a steady hand, many home improvement stores sell gadgets to help with this task.)
- Use a trim brush to create a swath of paint that extends out at least 3 inches from doors, windows, moldings and trim. This step will allow you to paint the wall with relative ease.
- With a roller, work in manageable, 3-foot sections, from the top of the wall to the bottom.
- Load the roller with paint and form a “W” on the wall. Then fill it in without lifting the roller from the wall.
- Turn the roller sideways to get as close as you can to the ceiling and baseboard.
- Don't press the roller against the wall to “squeeze” more paint out of it. Simply reload the roller with paint.
- Cover paint buckets or cans as well as brushes and rollers with aluminum foil if you need to take a break.
5) Paint the Trim
- Wait for the wall to dry completely before applying painter's tape along the edge of the baseboard and other trim. Press it down with your finger or a spoon.
- Paint the trim with a brush.
- Remove the tape shortly after you're finished painting instead of waiting for the paint to dry. This should prevent peeling.
Congratulations, your beautiful paint job is now done and drying, and will soon be ready for you to add wall decoratations. As much as you might enjoy painting, you probably will agree that while it's similar to frosting a cake, it's hardly a piece of cake. Home painting – and careful home painting -- requires time, patience and finesse. If you get overwhelmed, remember that the “wing men” at Experts In Your Home have run many “rescue missions” – and we're happy to do the same for you.
.jpg)
.jpg)